
Custom User Interface (ui.json)#
This section provides training on how to create custom user interface within Geoscience ANALYST using the ui.json standard. In this section we are going to demonstrate how to:
Read and write a ui.json from file
Demonstrate how to set up ANALYST to run a custom program
Creating a ui.json#
The ui.json format is based on the json standard - a format widely used in programming. Python comes by default with a json module to read and write to file. All we need is a way to create the structure that ANALYST understands. We can make use of the geoh5py.ui_json module to get started.
from geoh5py.ui_json import constants, templates
from training import assets_path
First, we need the base components must contain a few base parameters, such as a title and a run_command. A constants.default_ui_json is available to quickly get starget:
my_ui = constants.default_ui_json.copy()
my_ui["title"] = "Hello World!"
my_ui
{'version': '',
 'title': 'Hello World!',
 'geoh5': None,
 'run_command': None,
 'monitoring_directory': None,
 'conda_environment': None,
 'workspace_geoh5': None,
 'out_group': None}
Note that the run_command is currently set to None, and therefore nothing will be executed by ANALYST. We will get to that part later.
This user-interface doesn’t do much at the moment so we can add a few additional forms.
More parameters can be added by a simple update of the base dictionary. You can use any of the 8 forms currently supported:
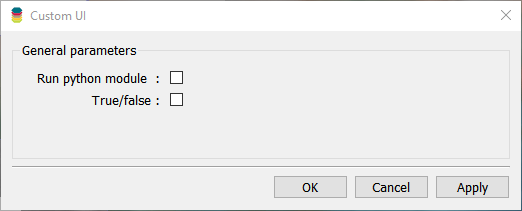
Bool value#
Checkbox to set an option as true or false.
my_ui.update({
    "value_bool": templates.bool_parameter(label="True/false")
})
You could write this dictionary directly to file using the built-in json module with
import json

with open(assets_path() / "myUI.ui.json", "w", encoding="utf-8") as file:
    json.dump(my_ui, file, indent=4)
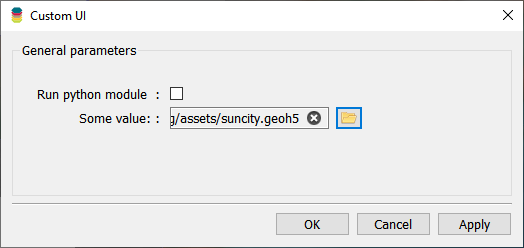
which writes it out as text file under the assets directory. From here you can drag & drop the file to the Viewport of ANALYST, which would render as:
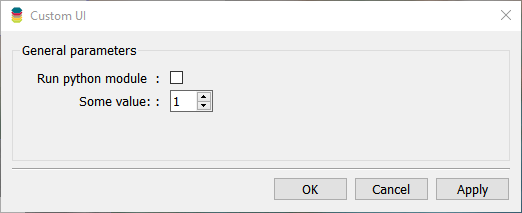
Integer value#
Value field for integers. It is possible to set min/max values to bound the output.
my_ui.update({
    "value_int": templates.integer_parameter(label="Some value:")
})
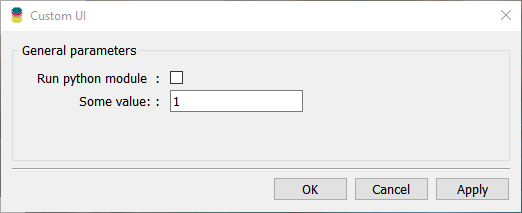
Float value#
Value field for floats. Bounds on value also available.
my_ui.update({
    "value_float": templates.float_parameter(label="Some value:")
})
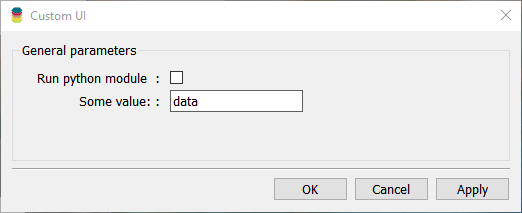
String value#
String field for text value.
my_ui.update({
    "value_string": templates.string_parameter(label="Some value:")
})
Multi-choice string#
Dropdown list of string values to chose from.
my_ui.update({
    "choice": templates.choice_string_parameter(label="Select:")
})

File choice#
Button to browse for a file on disk.
my_ui.update({
    "file": templates.file_parameter(label="Select file:", fileType=["geoh5"], fileDescription=["project"])
})
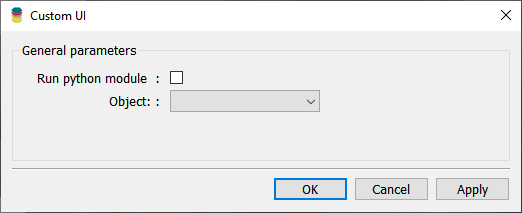
Geoh5 Object selection#
Dropdown selection for objects listed under an active ANALYST session. The mesh_type attribute lets filter specific object types by their uuid types
my_ui.update({
    "object": templates.object_parameter(label="Object", mesh_type="")
})
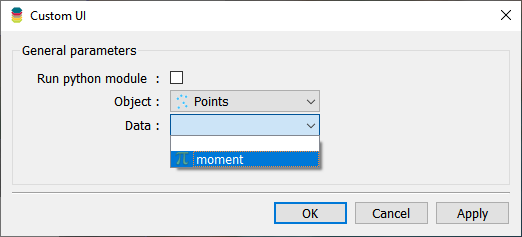
Geoh5 Data selection#
Dropdown selection of data listed under the parent object.
my_ui.update({
    "object": templates.object_parameter(label="Object", mesh_type=""),
    "data": templates.data_parameter(label="Data", parent="object")
})
You are invited to click on the link provided for each form to read about the different options available to further control your UI.
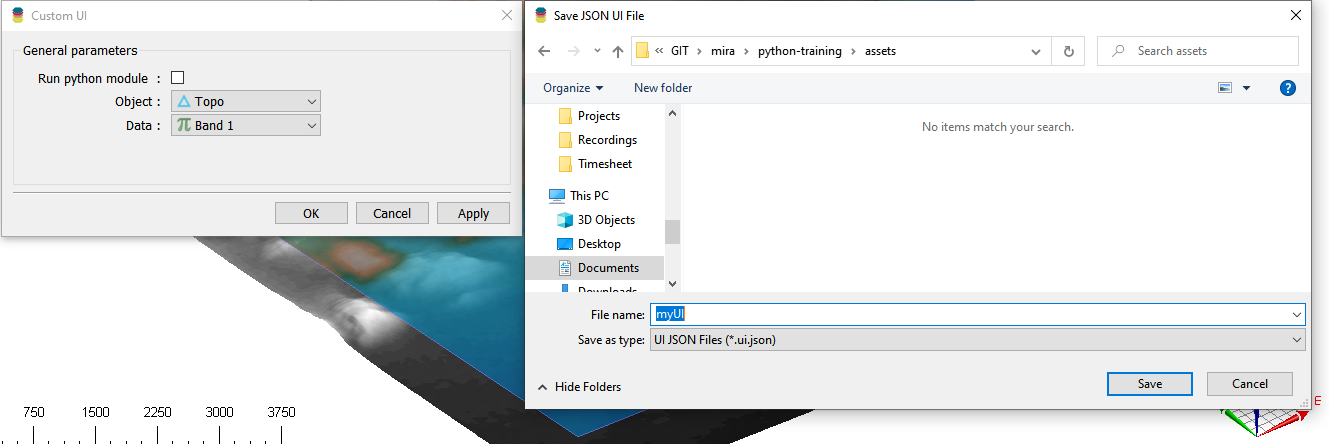
Once you are done adding forms:
Write this file out to disk
Drag & drop the ui.json to the viewport of ANALYST
Do some selections
Click
ApplyorOkto write back out the ui.json.
Copyright (c) 2022 Mira Geoscience Ltd.